Interface
Introduction
This guide will help you use NekoPlay's interface in 5 lessons.
Before you begin
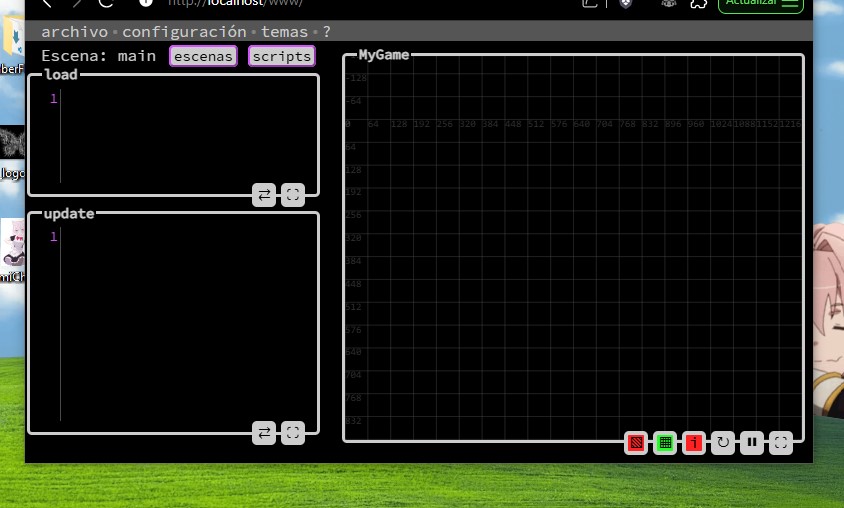
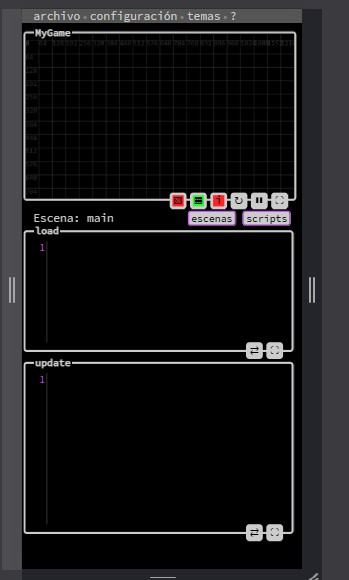
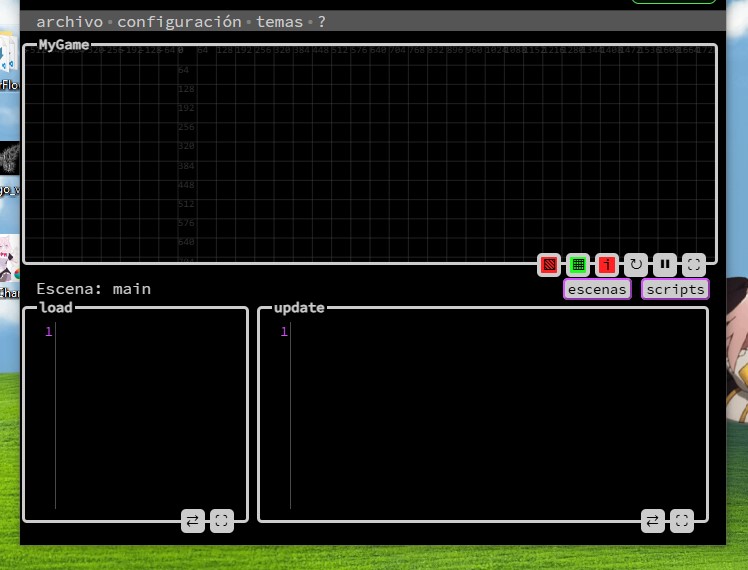
NekoPlay's interface adapts to the device you're using.
Regardless of the layout, you'll always find:
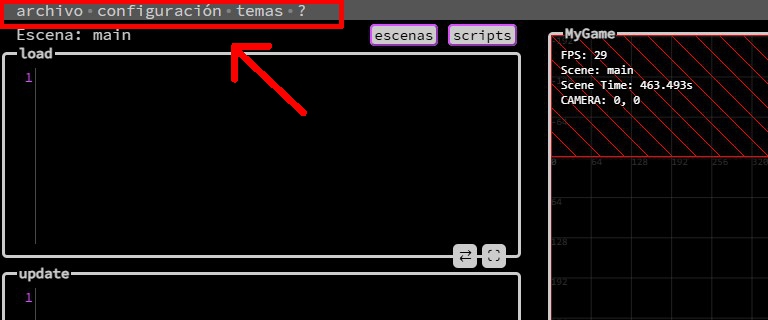
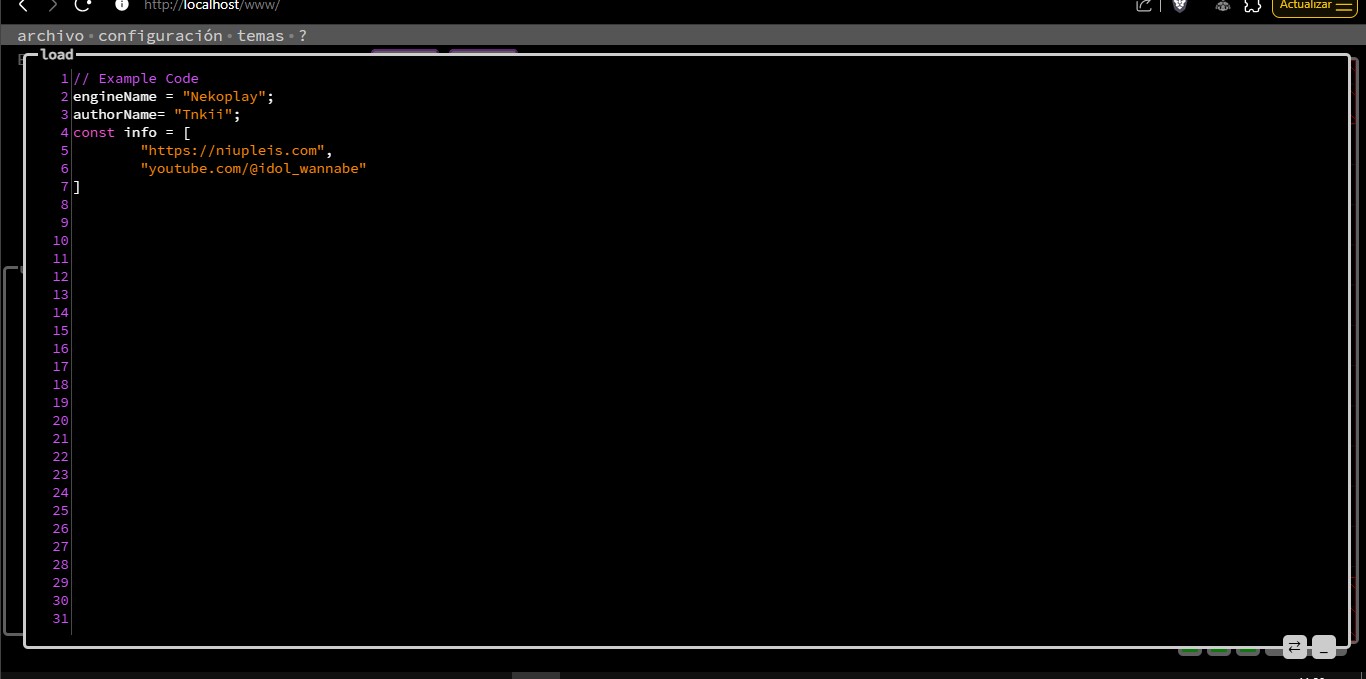
1. The text editor, where you write your scripts and define the game's behavior.
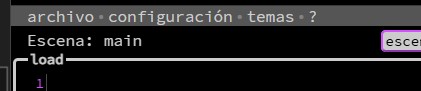
2. The top bar, with access to File options, Settings, Themes, and the help button ?.
3. The real-time game display, where you can test and see your game as you develop it.
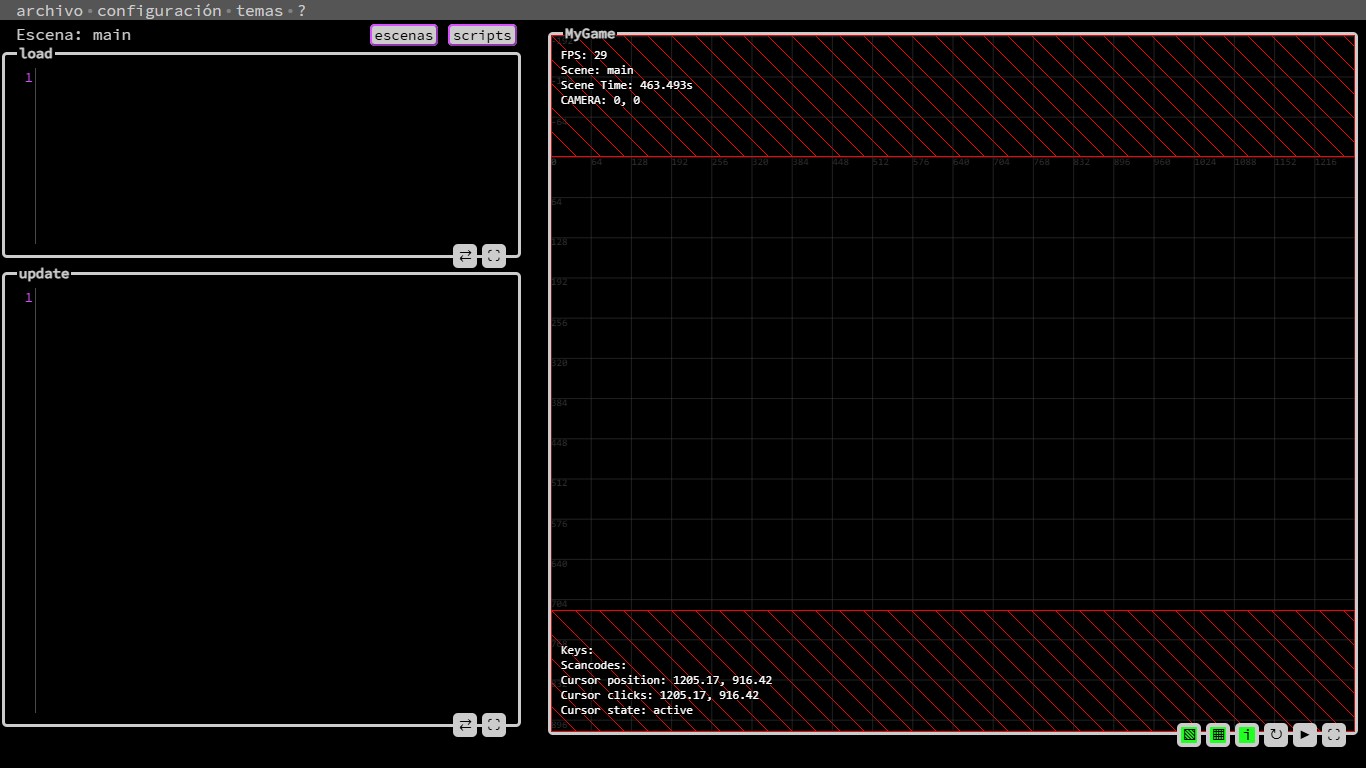
NekoPlay has three main layouts that adjust automatically based on screen size and orientation:
· Horizontal (desktop or landscape tablets)
· Vertical (phones and small screens)
· Intermediate (square or medium screens)
Game Setup →
Game Setup
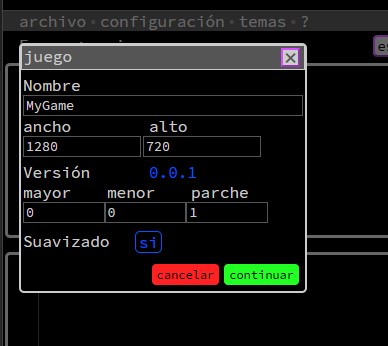
The first time you enter NekoPlay, this menu appears to configure your game.
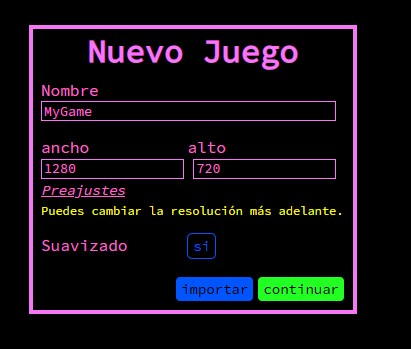
1. Your game's name.
2. Your game's resolution1
3. Resolution presets
4. Pixel smoothing (antialiasing)2
5. Import a game (".nkp" format)3
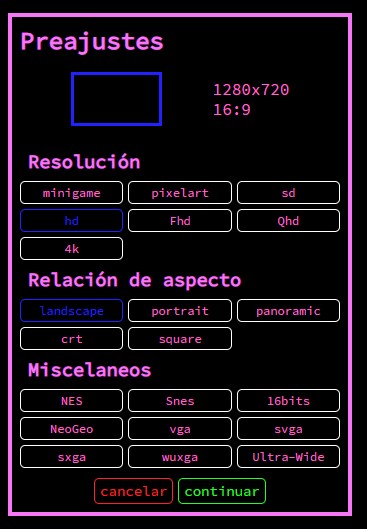
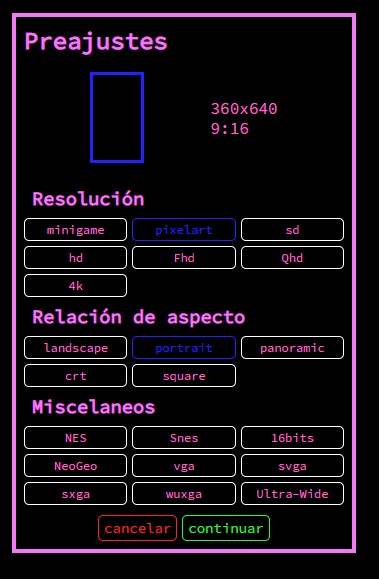
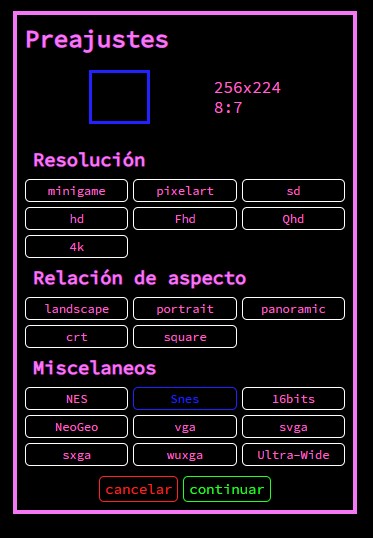
The presets window provides predefined resolutions based on:
1. Resolution
2. Aspect ratio
3. Standard sizes
And also shows a real-time preview (4)
↑1. Resolution
NekoPlay doesn't use a fixed resolution in pixels, but rather works based on asset sizes.
↑2. Antialiasing
Antialiasing is a technique that smooths the edges of graphics so they don't appear "jagged" or pixelated, especially when pixels are visible or when an image is scaled.
↑3. ".nkp" format
This is NekoPlay's official format for saving, importing, or sharing your games. It's a single file containing all project data: scenes, scripts, paths, configuration, and more.
Tools →
Tools
The toolbar is located at the top of the screen.
This bar contains four main buttons:
file, settings, themes, and ?
When you hover over any of them, their corresponding submenu appears. These menus close automatically when you move the cursor away from both the button and the submenu.
file
This menu has 4 options:
New, Import, Save, and Export
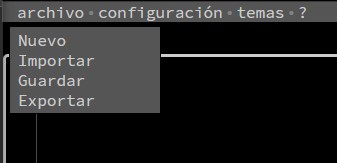
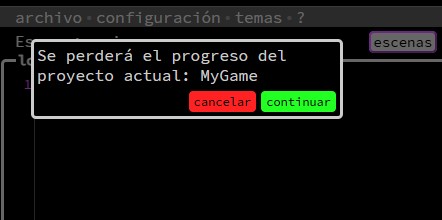
New
Reloads the page and starts an empty project.
Import
Lets you upload an .nkp file from your device to load a saved project.

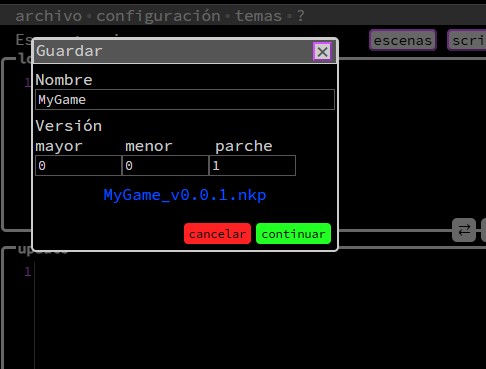
Save
Opens a menu to save your game locally as an .nkp file
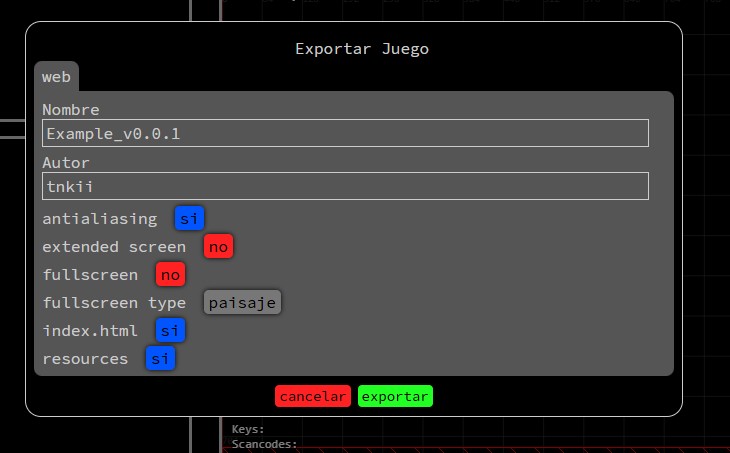
Export
Launches a client that lets you configure and download your game as an HTML5 project ready to publish.
settings
This menu lets you adjust the work environment and game parameters:
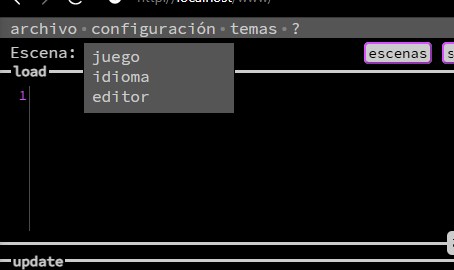
game
Change the game's name, base resolution, version, and smoothing (antialiasing).
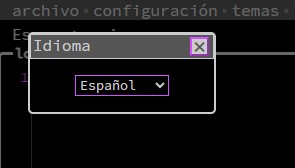
language
Select the interface language: Spanish, English, Portuguese, Japanese, Chinese, or Korean.
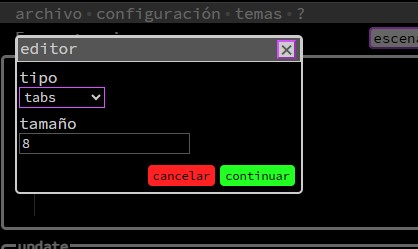
editor
Customize text editing by adjusting font size or tab/space usage.
themes
This menu lets you apply a visual style with one click:

?
A help button with information and external links.
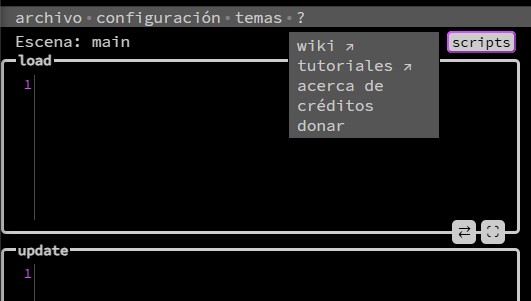
From here you can:
▸ Access the official wiki and tutorials
▸ View the about section with information about the engine and its creator
▸ Read the credits with details about the technologies used
▸ Donate if you want to support development with a small contribution via Ko-fi
Text Editor →
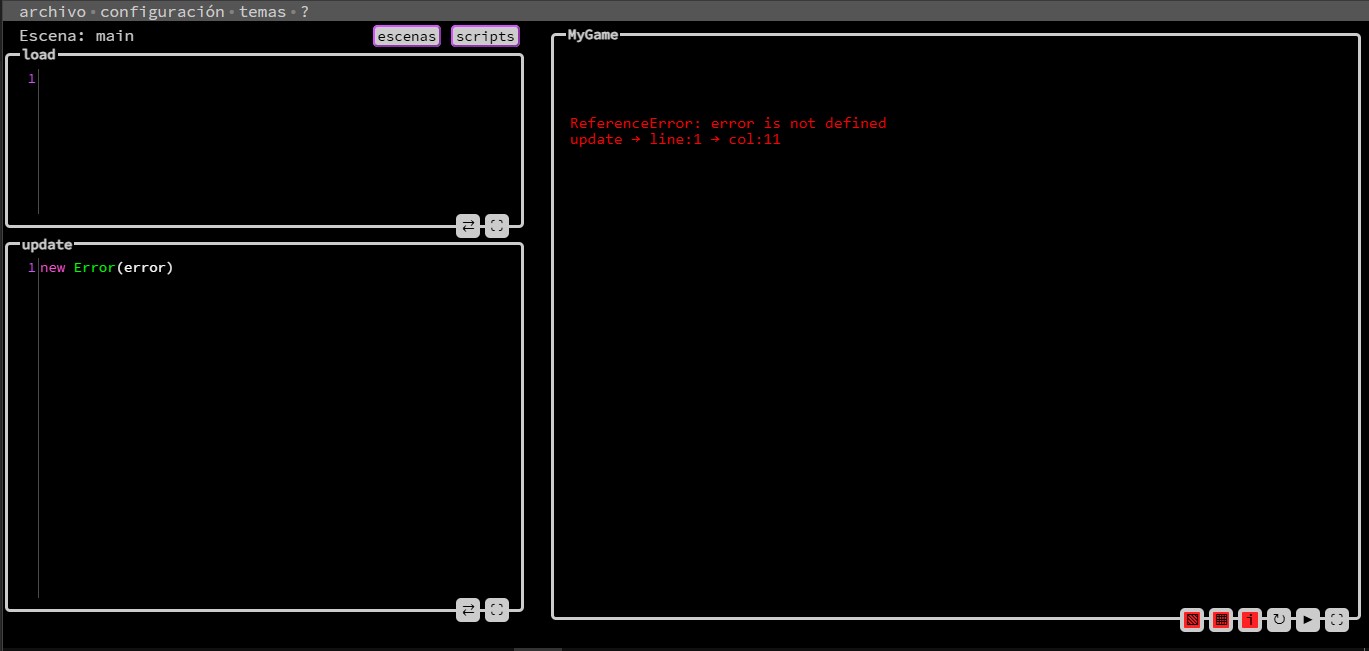
Text Editor
The text editor has three separate input fields, each with a label indicating its purpose:
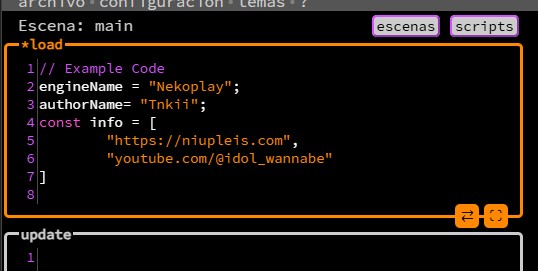
load Code that runs once when loading the scene.
update Code that runs every frame, ideal for movement logic or events.
script Editor for reusable functions or logic that doesn't belong to a specific scene.
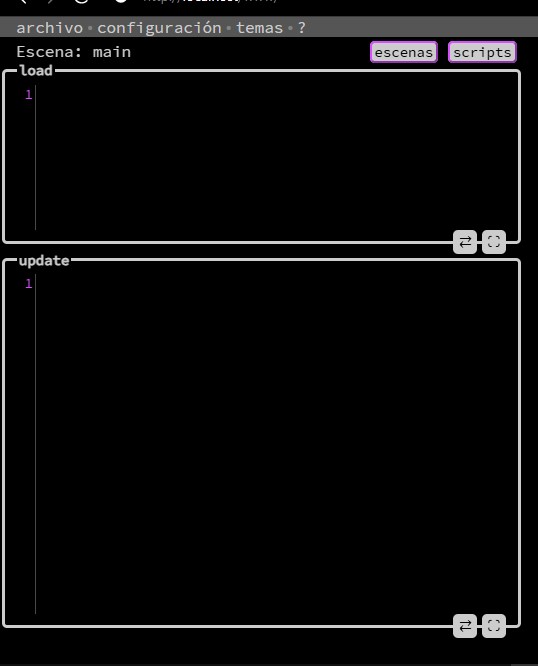
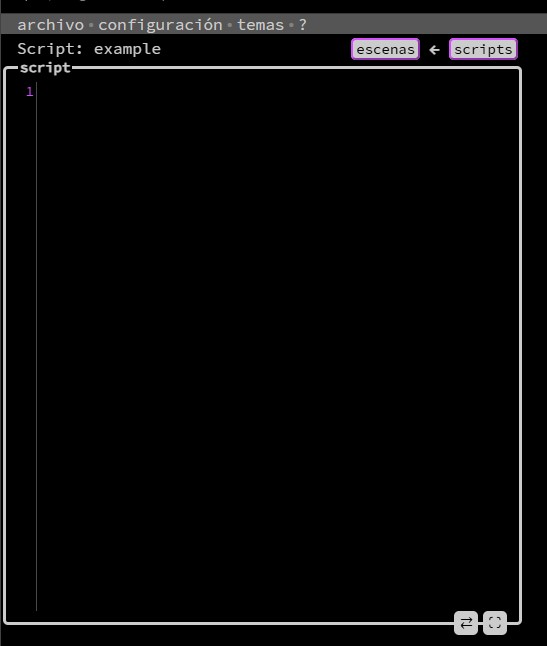
By default, you'll see the load and update fields, which correspond to the active scene.
When you choose to edit a script, those two are hidden and only the script field appears.
You can easily switch between scene and script from the top control bar (explained below).
Top Control Bar

Above the text editors you'll find a bar with information and buttons
1. Name of the scene or script you're editing.
2. Button to show the scene list.
3. Button to show the script list.
4. If you have both a scene and a script open, a third button appears that lets you quickly switch between them without opening the lists.
Scene and Script Lists
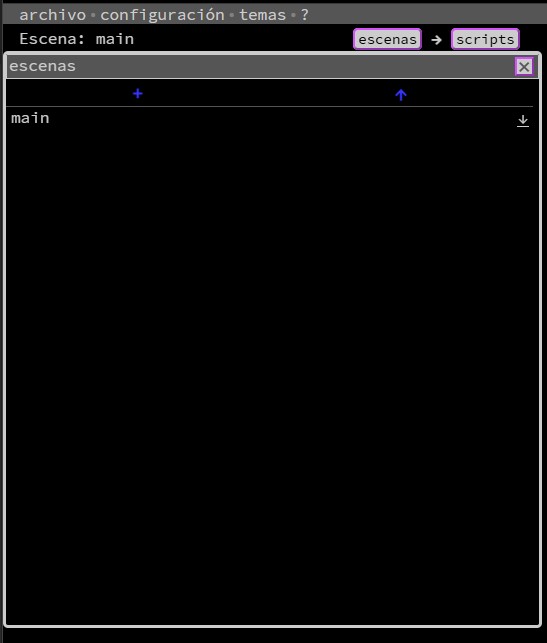
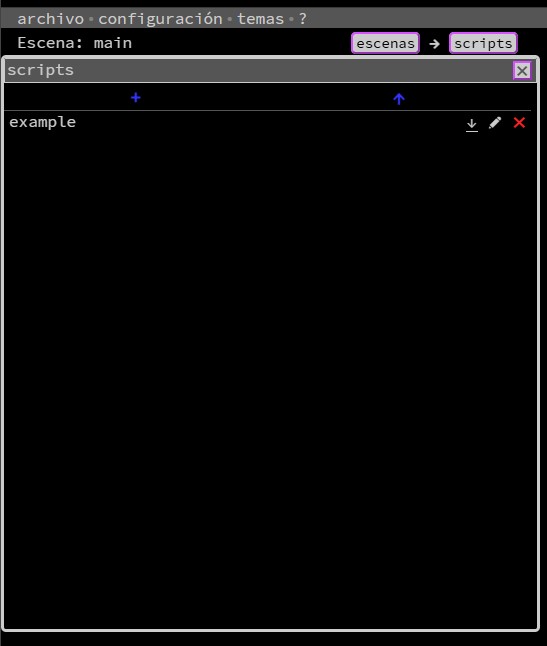
When you open either list, you'll see:
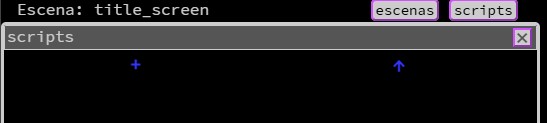
1. + New
2. ↑ Import
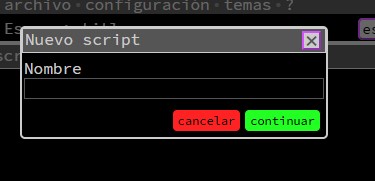
New
Opens a menu to name a new scene or script.
If it's a scene, the game display updates with an empty scene.
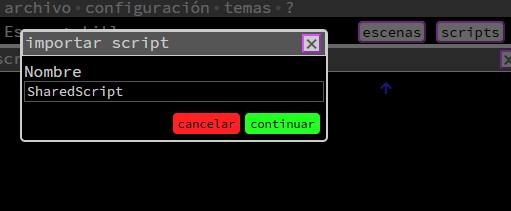
Import
Lets you upload a .nkscene or .nkscript file respectively.
Scenes and Scripts
Each scene or script in the list includes:
1. Name
2. Save
3. Rename
4. Delete
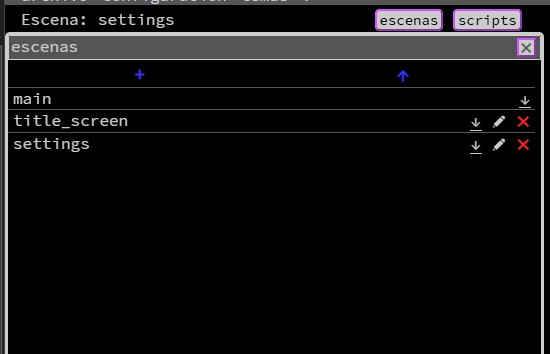
The main scene is special: It can't be deleted or renamed. You can only edit or save it.
Text Editors
Each editor (load, update, or script) has two buttons at the bottom right:
1. ⇄ Sync
2. ⛶ Fullscreen / _ minimize
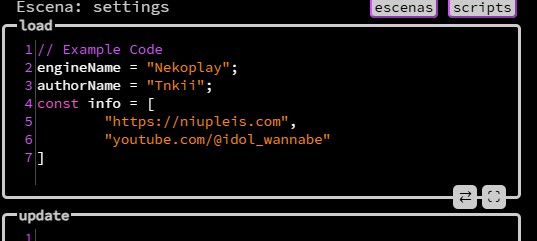
Sync
Saves changes and updates the game in real time. You can also press ctrl + s.
Fullscreen / minimize
Expands the editor to fullscreen for comfortable work, or minimizes it if already expanded.
If you edit something without syncing, you'll notice the editor's border changes color and the field label shows an * indicating there are pending changes.
This helps you quickly see if there's something you forgot to save.
Game →
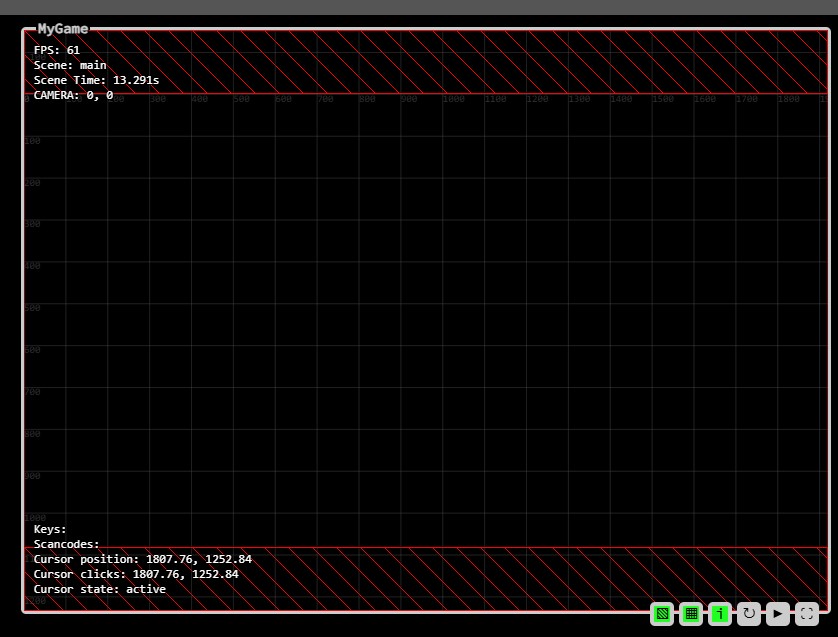
Game
The game display is the area where you can see your game running in real time while editing. Here the active scene is updated, letting you immediately test the changes you make to the code.
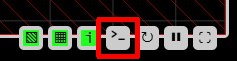
Debug Buttons
These three buttons let you show or hide visual debugging tools:
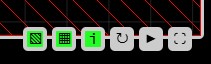
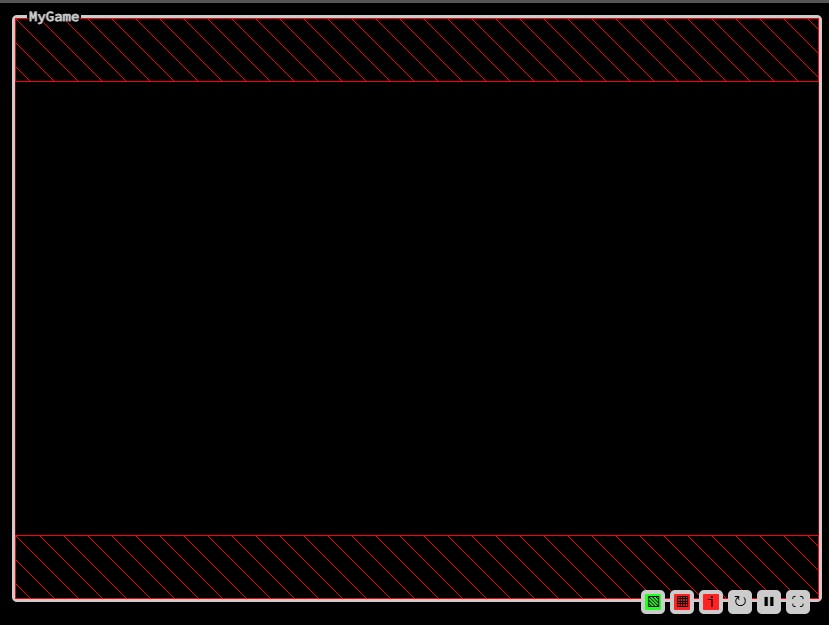
▧ Border
Shows or hides the boundaries of the game's visible area. Useful for understanding which parts of the scenario are visible on the final screen.
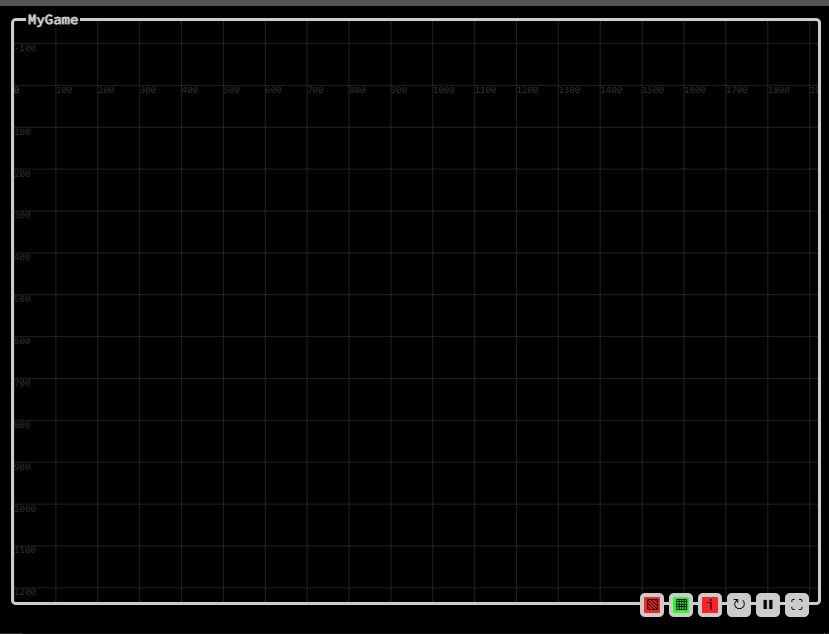
▦ Grid
Shows or hides a grid overlay. Useful for aligning elements and understanding spatial relationships.
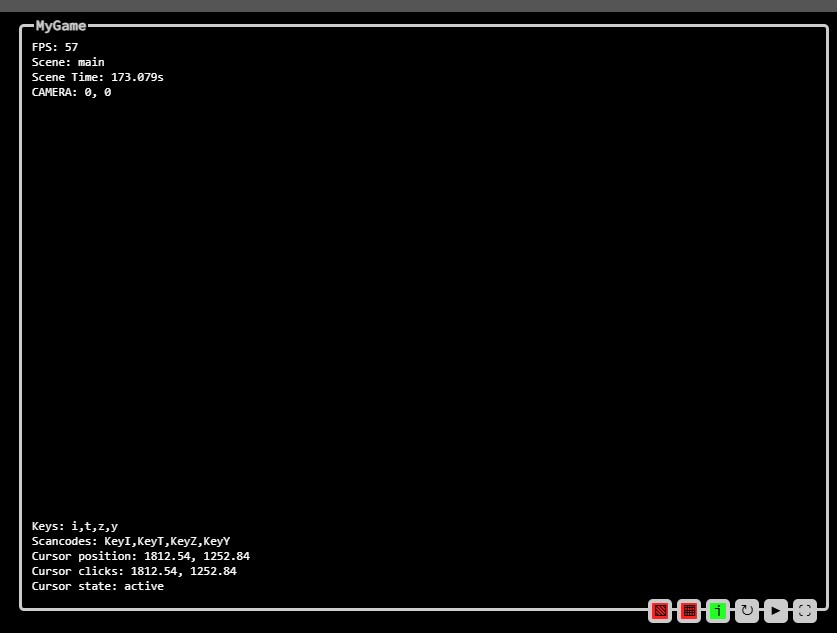
i Debug information
Shows or hides technical information about the game's performance and state.
Control Buttons
These three buttons control the game's execution state:
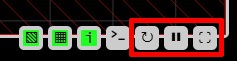
↻ Restart
Restarts the current scene from load.
❚❚ Pause / ▶ Resume
Stops or continues game execution. Very useful for reviewing details or frame behavior.
⛶ Fullscreen / _ Minimize
Expands the game to fullscreen or returns it to its original size for better viewing.
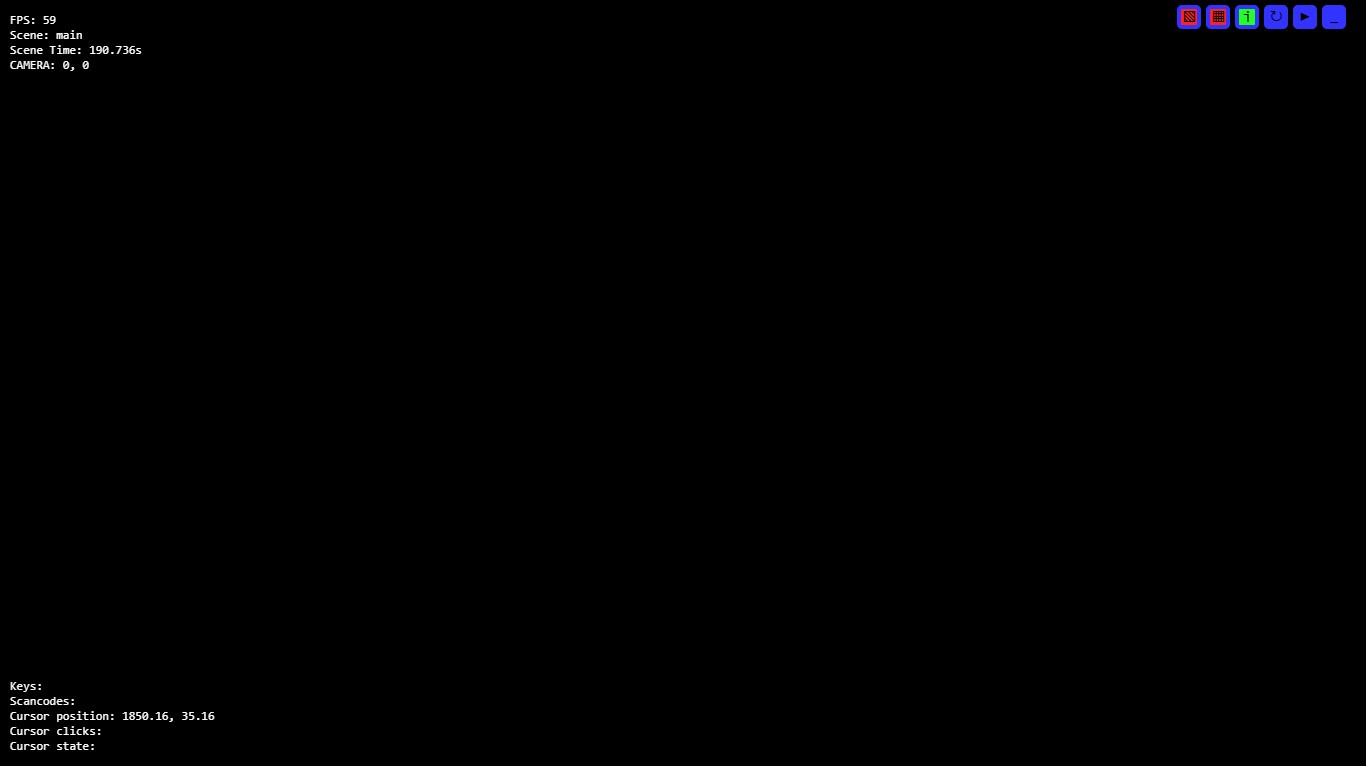
Console
The console is the area where messages generated by your game are displayed, whether they are print statements, errors, or warnings. It is a fundamental tool for debugging, as it allows you to understand what is happening in the code at any given moment. Here you can verify the execution flow, variable values, and detect potential problems without needing to stop the game.
You can also interact with the game by typing commands directly, which makes it easier to test specific functions or execute code snippets without having to modify files. This makes the console a flexible space for experimenting and diagnosing quickly.
Best Practices →
Best Practices
Although NekoPlay's interface is simple and intuitive, here are some recommendations to help you get the most out of it:
Sync frequently
Use the ⇄ button or press Ctrl + S to sync your code with the game in real time.
If you see an asterisk (*) next to the editor name (load*, update*, script*), it means there are unsaved changes.
Use debug tools only when needed
The debug tools (▧, ▦, i) are very useful while developing, but can clutter the view if left on all the time.
Activate them when you're adjusting something visual or reviewing the game's internal behavior.
Don't obsess over resolution
NekoPlay automatically scales the game according to the player's screen, so you don't need to worry about pixel dimensions.
Instead, focus on how the game looks within the visible area and how objects behave relative to the grid.
Use fullscreen for long editors
If your code is lengthy, use the ⛶ button to expand the editor.
This gives you more space to write and focus, especially useful on mobile or small screens.
Save your scenes and scripts separately
Although you can save the entire project in a single .nkp file, you can also save individual scenes (.nkscene) or scripts (.nkscript).
This helps with backups, sharing parts of your game, or reusing content.
Use the live view to experiment
You can make quick changes, sync them, and see the result immediately.
Don't be afraid to constantly try out ideas.